Every so often, I do a stream of some odd 1990’s software. I usually run this in VMware, because streaming from an old operating system is either incredibly challenging or just downright impossible. However, VMware isn’t exactly a game, and I wish to do other things on my computer while I stream (if it’s something like a music stream), so I end up having to create a little ceremony to do so. These are the steps I take, and they might prove to be useful for others.
The software I use for streaming is OBS, and I stream to Twitch. The part where you configure OBS to talk to Twitch is well documented, so I won’t repeat others here, but capturing a window can be a bit finicky.

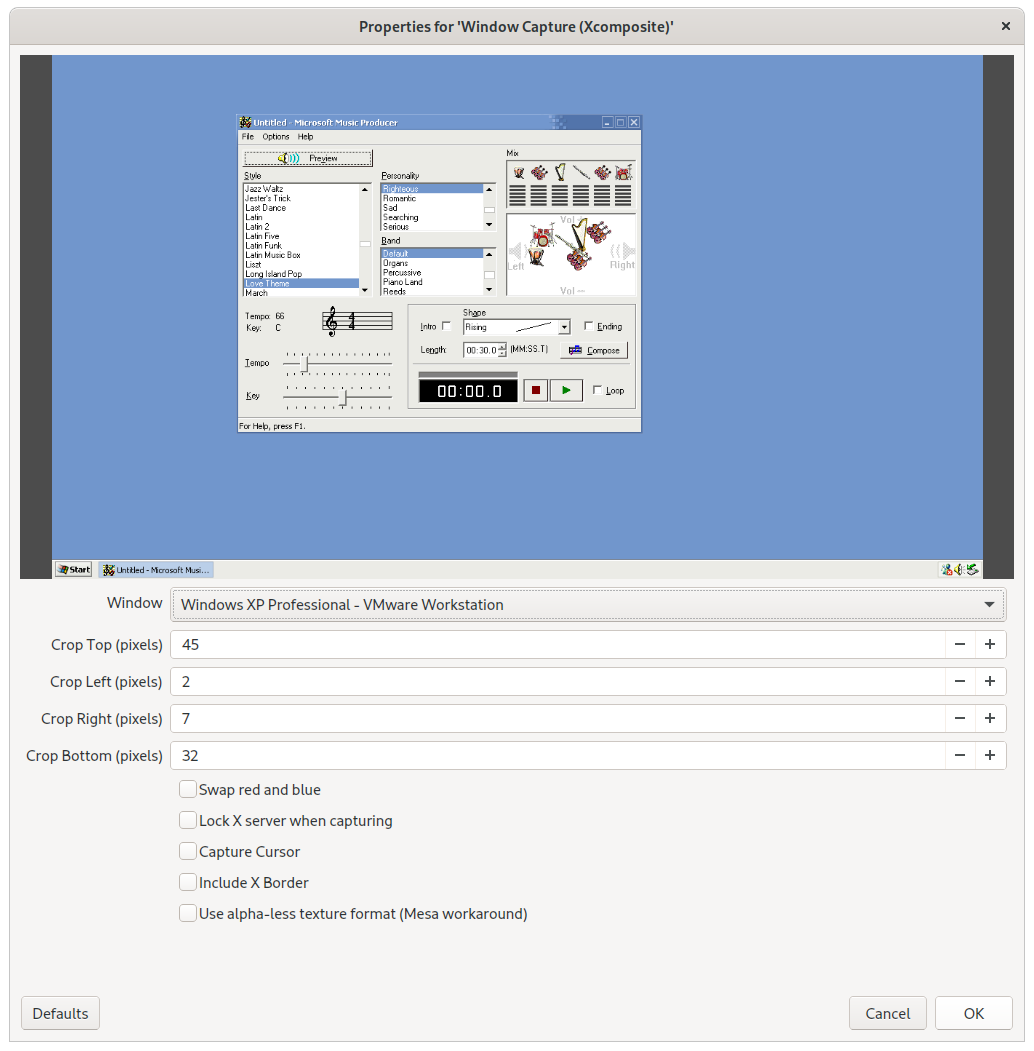
You’ll want to capture a window. For me, this is X11 based, so I add a capture and select the VMware window. Unfortunately, there’s some chrome on the VMware window, so you crop (by pixel values relative to the edges of the frame) to try to get it out of frame. This may involve some trial and error on your part, because it varies with themes. (I also set the resolution on my VM to something like 720p.)
Once you have video captured, you might want a separate audio feed just for the VM. This helps avoid accidents like streaming copyrighted audio. Instead of trying to re-purpose a physical audio feed you aren’t using (like say, HDMI audio) that could be muted or something (I’ve done it before, I haven’t had luck with it and don’t recommend it), I recommend using loopback audio. On most Linux/Unix setups, PulseAudio supports this. The command I use is below:
pactl load-module module-null-sink sink_name=Virtual1
On Windows, you could use something like Virtual Audio Cable; I haven’t tested it myself. When you have the virtual sink configured, you also need to reconfigure the application to use it instead of your real output source. Unfortunately for me, VMware uses ALSA instead of Pulse to talk to audio, and doesn’t seem to take kindly to manually reassigning the output through the VM settings. Instead, I have to use the PulseAudio volume control applet (pavucontrol), and change the output for VMware specifically from that.
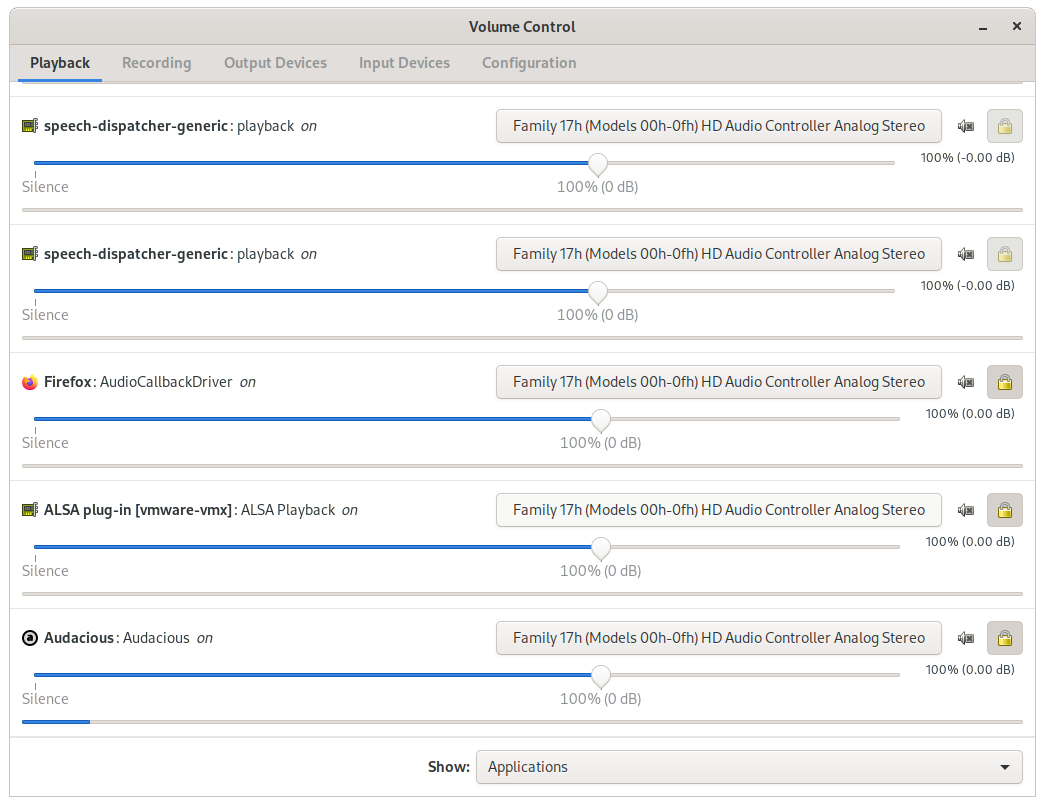
You’ll then need to configure OBS to pick up desktop audio from the virtual output and not your real ones; you can do that from the cog menu and hitting properties. (You can configure mic as you wish; I don’t use it.) For some reason, I haven’t had much luck with monitoring the output from OBS, but I can just do it from Twitch instead.
Once this is set up, you should be able to stream a VM in its own isolated world while you can continue to do other things on your computer. I’ve done some weird music software streaming before, so hopefully this guide will let you do the same thing.
When you say you couldn’t monitor the output in OBS, do you mean the audio, the video, or both? Seems annoying
The audio. There’s an option to check monitoring the output source, but it didn’t work for me. I assume it was because what I was monitoring was already an output, so it could be assumed I could hear it, whereas an input you want to know what it sounds like coming in.